Creating beautiful and functional landscaping in a sloping yard can be challenging, but stone walls provide an elegant solution. In Hawaii, where natural terrain often includes mountains and valleys, rock walls provide aesthetics and critical erosion control and insulation. In this blog, we’ll delve into expert tips for Hawaiian homeowners on incorporating rock walls into sloped yards.
If you plan to build the best Hawaiian rock wall, consider Oahu Concrete Contractors as your trusted partner. They specialize in lava rock wall construction and masonry, ensuring the highest quality craft at competitive prices. They’ll bring your vision to life with expertise and dedication, enhancing your property with enduring beauty and functionality. Now, let’s get back to giving you tips on how to integrate rock walls into your sloped yards.
How to Design Rock Walls for Your Yard
Designing a functional and aesthetically pleasing rock wall requires careful planning and attention to detail. Below are the tips to consider when embarking on this project:
Assess the Slope
Before you begin designing your rock wall, assess the slope of your yard. Determine the steepness and overall layout to understand the extent of the project. This assessment will help you decide the number and height of the walls needed to create a stable and attractive landscape.
Choose the Right Rocks
Selecting an appropriate type of rock is important for the functionality and look of your wall. When planning a landscape in Hawaii, the selection of materials such as lava rock, basalt, and coral stone plays a crucial role due to their availability and durability. These natural stones not only offer a strong foundation but also enhance the aesthetic appeal of your outdoor space.
Plan the Layout
Plan the layout of your rock wall carefully. Take into account the wall’s height, length, and any bends or corners needed to fit your yard’s contours. Create a detailed sketch or blueprint to guide the construction process and ensure accurate placement.
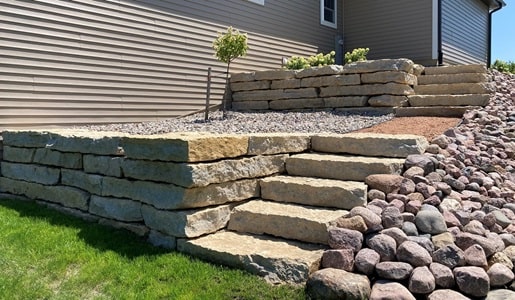
Incorporate Terraces
Incorporate terraces into your rock wall design to maximize usable space. A solid foundation is essential to the stability of your stone wall. Start by digging a trench deep enough to support the foundation stones, usually a third of the height of the wall. Fill the trenches with gravel to improve drainage and prevent wall shifting.
Integrate the Plants with the Soil
Enhance the beauty of your stone wall by combining plants with landscape elements. You can use native Hawaiian plants that grow in the local climate and require little maintenance. Consider adding creeping plants or vines that can flow over the wall and help stabilize the landscape by adding interest.
How to Build Your Rock Wall
After designing the layout of your rock wall, it’s now time to embark on its construction journey. Below are the essential steps to guide you through the building process:
Step 1: Prepare the Foundation
A solid foundation is essential to the stability of your rock wall. Start by digging a deep trench to support the bedrock below, usually about a third of the height of the wall. Fill the trenches with gravel to improve drainage and prevent wall shifting.
Step 2: Lay the First Course
The first course of rocks is the most important, laying the foundation for the entire wall. Use larger stones at the base, making sure they are even and well-packed. Take the time to build this masonry properly, as any mistake here can affect the stability of the entire wall.
Step 3: Build Up the Wall
Continue building up the wall by laying subsequent courses of rocks. Stagger the joints between rows to enhance stability, and use smaller stones to fill gaps and create a tight fit. As you build, check for levelness regularly to maintain a straight and even wall.
Step 4: Backfill and Drainage
Adequate drainage is essential to avoid pressure build-up outside the wall. When building, refill the space behind the wall with gravel or crushed stone to keep the water down.
Step 5: Capping the Wall
Capstones provide a finished look and add stability to the top of the wall. Choose flat, large stones for the cap, and secure them in place with mortar if desired. Ensure the capstones are level and extend slightly over the edge of the wall to protect against erosion.
Maintenance Tips for Rock Walls
Keeping your rock walls in optimal condition requires regular care and attention. Below are key tips to help you maintain their durability and appearance:
- Regular Inspection: Perform regular inspections of your stone wall for any signs of damage or leaks. Look for cracks, loose rock, or protruding pieces that could indicate structural issues.
- Cleaning and Rust Prevention: Keep your stone walls clean and free of debris. Remove grass or plants that grow between stones, as their roots can cause displacement.
- Repairing Damage: Address any damage to your rock wall promptly. Replace loose or damaged stones and fill any gaps with fresh gravel or mortar.
- Managing Water Drainage: Ensure the drainage system behind your rock wall remains functional. Clean out weep holes and drainage pipes regularly to prevent blockages.
- Seasonal Care: Different seasons may require specific maintenance tasks. In the rainy season, monitor for signs of erosion or water damage. During dry periods, check for soil settling and potential gaps in the wall.
- Hiring contractors: Consider hiring contractors for complex or large stone wall projects. Seasoned contractors possess the expertise and equipment to build strong, beautiful stone walls.
- Enhance the aesthetic: Enhance your stone wall by adding lighting, decorative stones, or water features. Solar lamps or spotlights can illuminate the wall and create a nice look at night.
Building and maintaining rock walls in Hawaii requires careful planning, skilled execution, and regular maintenance. By following these expert tips, Hawaii homeowners can create stunning and functional landscapes that maximize the beauty and value of their property.
If you want to have a Hawaiian rock wall but need more time or expertise to build one yourself, consider the expertise of Oahu concrete contractors. Their team includes skilled professionals in concrete, lava rock wall construction, stonework, and brickwork.
Notably, they employ Tongan rock wall builders, renowned across Oahu, for their exceptional craftsmanship in lava rock wall construction. Let them bring your vision to life with quality and precision, ensuring your satisfaction with every project.